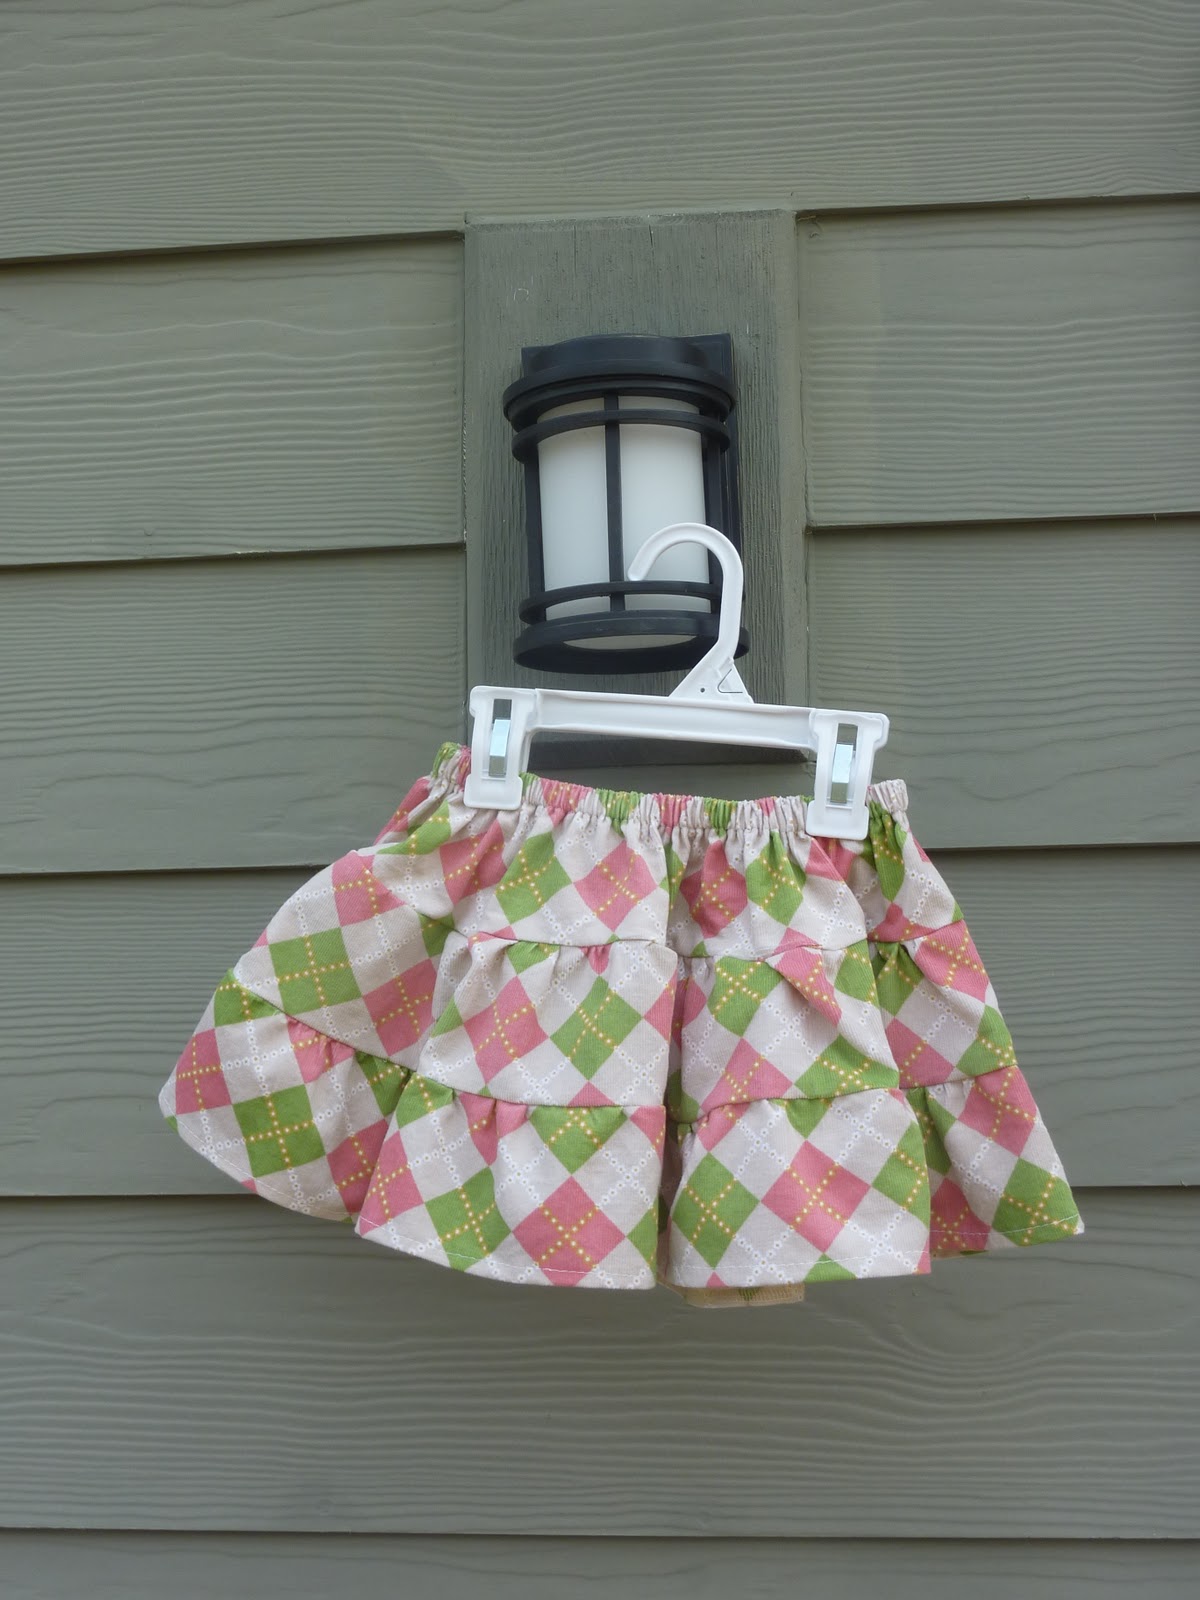
This Skirt is a kid sized version of the skirt that I made here. I haven't yet perfected the magic numbers to make each tier work out, I get a rough idea, and the eye it until it looks right (sorry I can't be more specific).
The fabric is a printed corduroy from JoAnn's, I got it as a remnant piece for like $4, and it just screamed "preppy little tiered skirt".
I love the movement on it, and the beauty of the tiered skirt is that it is extremely forgiving (My sewing skills are far from perfect ; ) ).
The basic Idea is a top tier (slightly wider than waist size) and then two additional tiers each getting larger, depending on the amount of fullness you want. The width of each strip is the desired length of the skirt/3. Make sure to add an extra inch to the top tier (to account for the casing for the waistband).
Start from the bottom up. Hem the bottom then gather the top of the lowest tier then attach it to the bottom of the next tier. Repeat the gathering with tier 2 and attach it to the bottom of the top tier. Make a casing for the elastic waistband, add the elastic - and viola! (Sorry I don't have pictures. I'm working on being better about taking pictures while I sew...)
Thursday, April 7, 2011
Wednesday, March 23, 2011
Annoying No More
I think one of the most annoying things in the world is someone knocking on your door, trying to sell you something and not taking no for an answer.
The husband and I debated over getting a no soliciting sign.
One thing held us back. That's right, one thing.
The husband and I debated over getting a no soliciting sign.
One thing held us back. That's right, one thing.
Girl Scout Cookies
With the exception of the UPS man, those Girl Scouts are my most favorite surprise visitors.
So, what to do to handle this. The husband and I came up with a solution.
Hope you enjoy it.
Once again, Kim provided the vinyl cutting.
Happy Creating!
Melissa
KitchenAid
What do you do with your plain old white KitchenAid?
You find a friend who does vinyl and you dress it up.
(Thanks Kim)
Happy Creating!
Melissa
Tuesday, March 22, 2011
the "Sophie" Skirt and the Grown-up Tiered Skirt
So, we did family pictures a few weeks back. Here is me and my cute girlie:
It wasn't intended, but we both ended up wearing skirts that I made. It still feels a little funny (clothes are something that I put off sewing for years because they scared me so much.)
First, hers:
This seriously was the result of walking around the fabric store with Melissa until something screamed at me. What that something ended up being was this kind of polka-dotted tulle. I matched it with a lining fabric, and was first going to do a take on the tired skirt you'll see in a minute. That evolved from a few different ideas into this ruffled skirt. I made a tube, slightly bigger than my girlie's waist, added a rolled hem to the bottom and then sewed the ruffles (strips of gathered tulle - as ruffly as you want) right on to the lining. In this case I ended the ruffles right below where the waistband would sit, then added a casing and elastic. I'm not super happy with the waistband, but I know how to make it better for next time.
Now the tiered skirt that I'm wearing :
My initial Dimensions were created using the formula found here. That was a little too full for my taste though, so I cut down the 2nd and 3rd tiers to make them a little bit more modern and grown-up. This is one of my favorite skirts now, and is the go-to in my closet (it also looks great with my brown boots ; ) )
And just one more of me and my cute crazies (and another good view of the skirts):
**Thanks to Alexis Merritt (http://alexismerrittphotography.com/) for the great family pictures. (Go check her out!)
It wasn't intended, but we both ended up wearing skirts that I made. It still feels a little funny (clothes are something that I put off sewing for years because they scared me so much.)
First, hers:
This seriously was the result of walking around the fabric store with Melissa until something screamed at me. What that something ended up being was this kind of polka-dotted tulle. I matched it with a lining fabric, and was first going to do a take on the tired skirt you'll see in a minute. That evolved from a few different ideas into this ruffled skirt. I made a tube, slightly bigger than my girlie's waist, added a rolled hem to the bottom and then sewed the ruffles (strips of gathered tulle - as ruffly as you want) right on to the lining. In this case I ended the ruffles right below where the waistband would sit, then added a casing and elastic. I'm not super happy with the waistband, but I know how to make it better for next time.
Now the tiered skirt that I'm wearing :
My initial Dimensions were created using the formula found here. That was a little too full for my taste though, so I cut down the 2nd and 3rd tiers to make them a little bit more modern and grown-up. This is one of my favorite skirts now, and is the go-to in my closet (it also looks great with my brown boots ; ) )
And just one more of me and my cute crazies (and another good view of the skirts):
**Thanks to Alexis Merritt (http://alexismerrittphotography.com/) for the great family pictures. (Go check her out!)
Sunday, March 20, 2011
Ava Tie Top Dress (part 1)
The pattern used for this project is the "Ava Tie Top Dress" by Izzy and Ivy Designs. More info can be found here.
My mom picked this pattern up a while back, and never got around to making it. So-she passed it on to me, and I sat on it for a while, and finally decided to get up the courage to give it a try. It incorporates two techniques that I wasn't super comfortable with (shirring, and rolled hem edges), so this is my first "tester" dress. I had to try it out on some inexpensive fabric before I make it on the expensive stuff (am I the only one who does this?) Anyway, my tester actually turned out pretty cute, so I have to share.
My resident supermodel was not interested in cooperating yesterday, so you get just the picture of the dress, but I think it comes across okay, even on the hanger. I altered the design from the original by omitting the pin-tucks at the hem, and adding the ruffle instead (just to tie-in the tie fabric, because they are both pretty bold prints).
The fabric is from wal-mart (I got it for about $1/yd on a 75% clearance sale). I had half a yard of each, and have plenty of the stripe left over. That is for a 24 month size, which fits my average sized 2 year old - but not for long. My next dress will be the size 3-4.
Stay tuned for more, and thanks for stopping by!
Friday, March 18, 2011
Pedestal Plates
| Thrift Store finds |
| Fantastic Trivet |
| Wedding present silver candlestick |
| Wedding present votive holder |
| Freebie fun trivet |
| Silver candlestick again, the 2nd of the set |
| Super cute plate from a Garage sale |
These are my new favorite projects. A friend of mine told me about the ones she was making, so I went through my stuff and found the supplies at home.
What you'll need is:
Really Cute Plate/Trivet/Bowl
(from your own cupboards, garage sales, thrift stores, Marshalls, etc.)
Good Solid candlestick
(same places you find the plates)
Marine Epoxy
(I got mine at Lowes)
I remembered that I had marine epoxy from when I made a homemade snow globe. So I was able to start right away.
The instructions are so basic...
Find the center of your plate
Follow the epoxy instructions to attach candlestick to the center of the plate
That's it.
Really.
Host a party with your new fantastic Pedestal Plates.
Happy Creating!
Melissa
Thursday, March 17, 2011
Ribbon Skirt
This is seriously the easiest skirt to make!
Measure your child's waist.
Cut the elastic plus 1 inch to fit.
Cut your fabric (2) pieces the width of waist measurement and the length you'd like it plus 2 inches.
Knot the Ribbons.
Stitch Ribbon pieces on, however many you'd like.
Sew the ends of the skirt together, to make a tube.
Roll the top and insert the elastic.
Then it's just a simple hem and you're all done.
Happy Creating!
Melissa
Wednesday, March 16, 2011
Fabric Hair Flowers
I started seeing these around here and there about a year ago, I thought they were cute, but probably way to complicated for my "lazy-man" crafting style. Then I started finding tutorials out there in blog-land, and I got hooked! They are WAY EASY and super fun. Anyway here is a sample of what I've made, with some tips I've learned along the way.
First off - fabrics I've used are Tulle, Organza, and Taffeta. I've tried satin, and it didn't work so hot, but I might give it another try. I think I just wasn't patient enough. Any good old 100% polyester fabric that you can melt (not burn) the edges of will work.
With the tulle, I used almost 20 layers for each flower. It's pretty thin, and it takes that many to make it look right.
I had a candle lit, and sitting nearby so I didn't have to keep using my lighter, much easier. A great use for tea lights.
The layers are just different sized circles that I cut and layered until I got the effect I was looking for
Also, I sewed my layers together instead of gluing. I think it looks nicer.
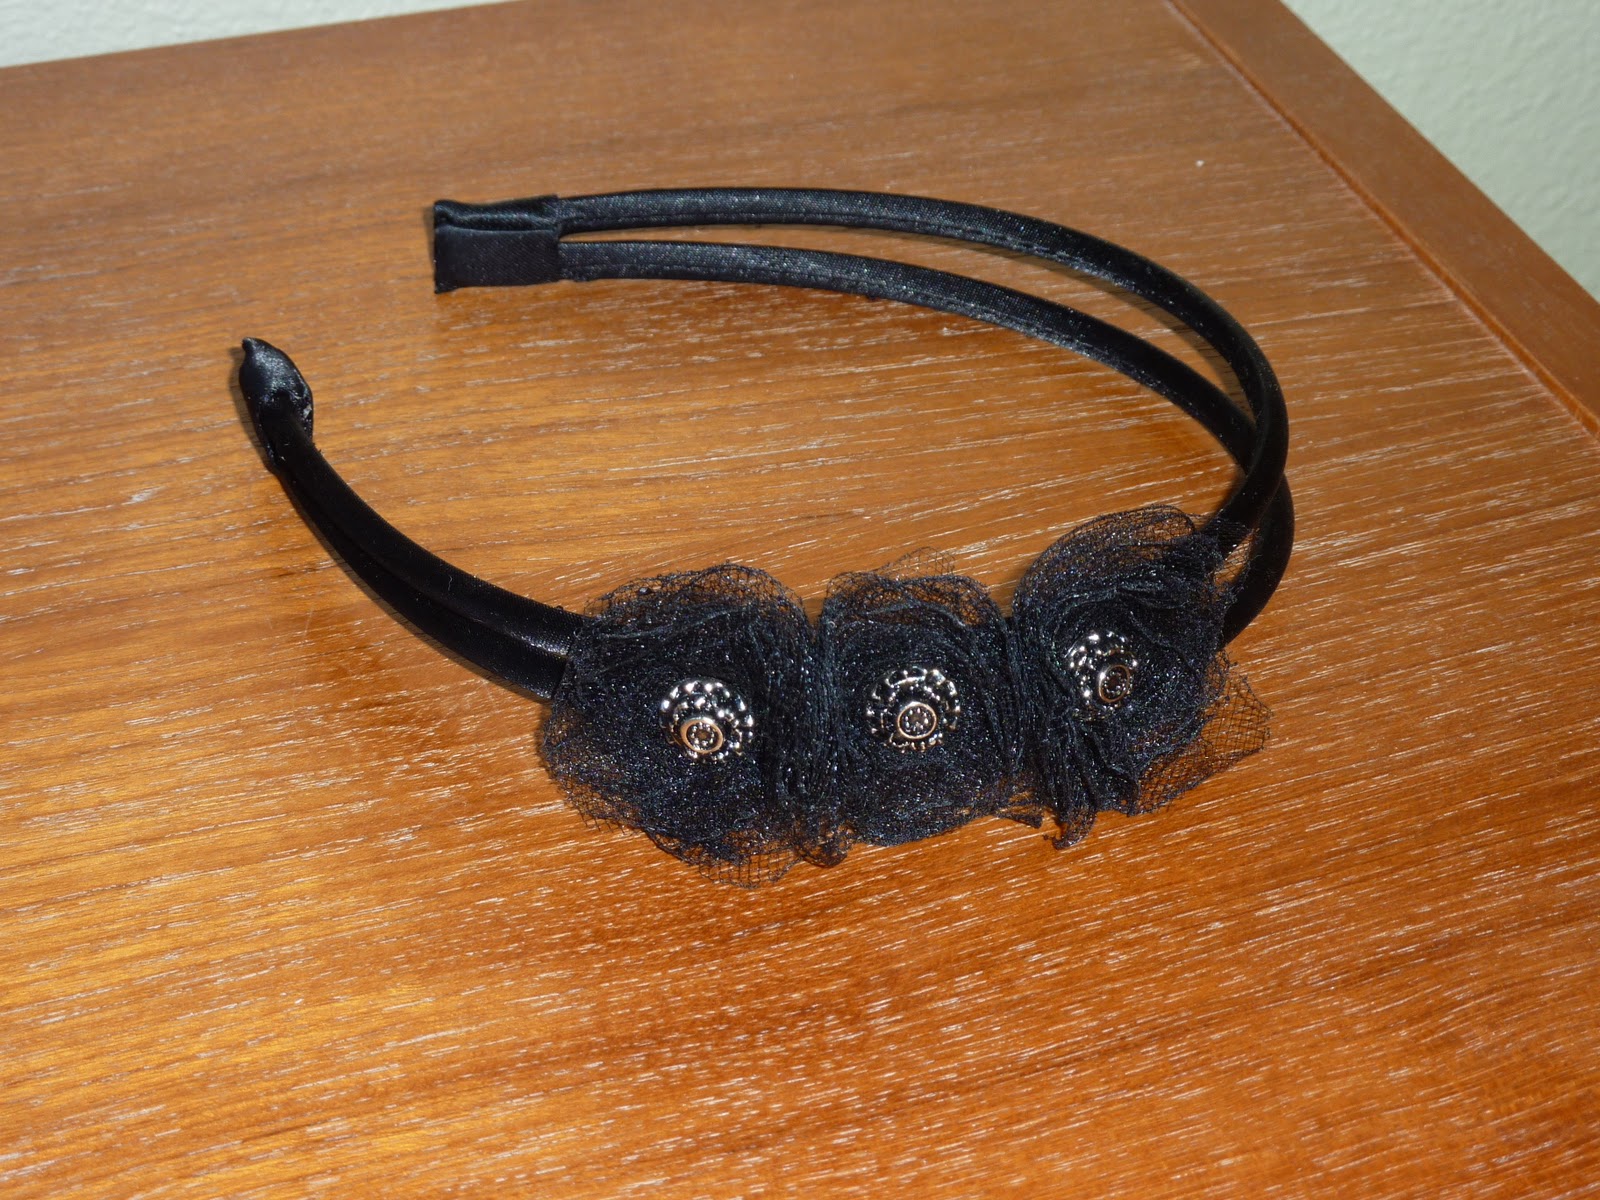
My favorite centers are from the Antique Brad set (love them) that I got from Stampin' up.
Can I just say how much I am loving this headband. I took 3 small flowers and glued them onto a $1.95 ForLove21 headband. Super happy with it. (The headband I mean, not so much the picture- but my husband thinks I needed a shot of me wearing it.)
My cute daughter loves hers too.
First off - fabrics I've used are Tulle, Organza, and Taffeta. I've tried satin, and it didn't work so hot, but I might give it another try. I think I just wasn't patient enough. Any good old 100% polyester fabric that you can melt (not burn) the edges of will work.
With the tulle, I used almost 20 layers for each flower. It's pretty thin, and it takes that many to make it look right.
I had a candle lit, and sitting nearby so I didn't have to keep using my lighter, much easier. A great use for tea lights.
The layers are just different sized circles that I cut and layered until I got the effect I was looking for
Also, I sewed my layers together instead of gluing. I think it looks nicer.
My favorite centers are from the Antique Brad set (love them) that I got from Stampin' up.
Can I just say how much I am loving this headband. I took 3 small flowers and glued them onto a $1.95 ForLove21 headband. Super happy with it. (The headband I mean, not so much the picture- but my husband thinks I needed a shot of me wearing it.)
My cute daughter loves hers too.
![]() |
| photo courtesy of Alexis Merritt |
Tuesday, March 15, 2011
Fleece Backed Baby Blanket
Perfect gift for a mom having twins, one boy, one girl.
Find miscellaneous fabric scraps that are the colors you would like to use.
Cut them to 4-5 inch squares.
Lay them out in a pattern you like.
Sew them together line by line, then row by row.
Cut your fleece* to match the the size of your blanket top.
Stitch right sides together.
Turn right side out and top stitch.
You could quilt it too if you wanted, I didn't.
Happy Creating!
Melissa
**I buy the blankets from Walmart when they're cheap. It's cheaper then buying fleece by the yard.
Subscribe to:
Posts (Atom)